Setting up a MySQL database for your Django project involves a few key steps. Below is a step-by-step guide to integrate MySQL into a Django project running on localhost:
Install MySQL:
If you haven’t already, download and install MySQL Server on your machine: MySQL Community Server.
Install MySQL client for Python:
You’ll need the mysqlclient library which acts as a bridge between Django and MySQL.
|
1 |
pip install mysqlclient |
Create a MySQL Database:
After installing MySQL, open your MySQL client (like MySQL Workbench, PHPMyAdmin, or the command-line interface) and create a new database for your Django project.
Modify Django Settings:
- Open the
settings.pyfile in your Django project. - Change the
DATABASESsetting to something like this:
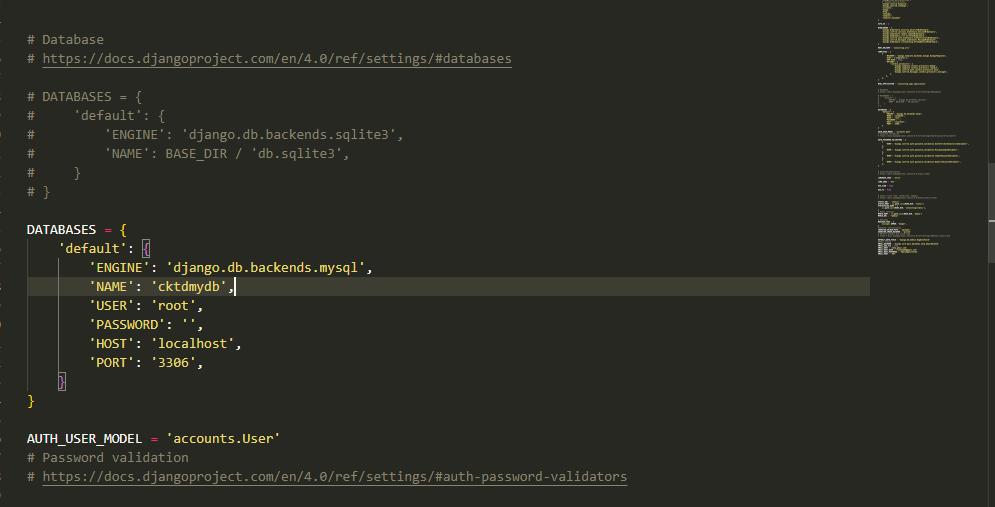
|
1 2 3 4 5 6 7 8 9 10 |
DATABASES = { 'default': { 'ENGINE': 'django.db.backends.mysql', 'NAME': 'your_database_name', 'USER': 'your_mysql_user', 'PASSWORD': 'your_mysql_password', 'HOST': 'localhost', 'PORT': '3306', } } |
Replace 'your_database_name', 'your_mysql_user', and 'your_mysql_password' with appropriate values.
Run Migrations:
With the database configured, you can now set up the database schema.
|
1 |
python manage.py migrate |
Test the Configuration:
Run the Django development server:
|
1 |
python manage.py runserver |
Navigate to the provided URL in your web browser. If everything is set up correctly, you should see the default Django welcome page without any errors.
Considerations:
- When deploying to a production environment, ensure that your MySQL server is secured.
- Regularly back up your MySQL database.
- Keep the
mysqlclientlibrary updated.
With these steps, you should have a Django project running with a MySQL database on your localhost. If you encounter errors, make sure to check the Django and MySQL logs for more detailed information.